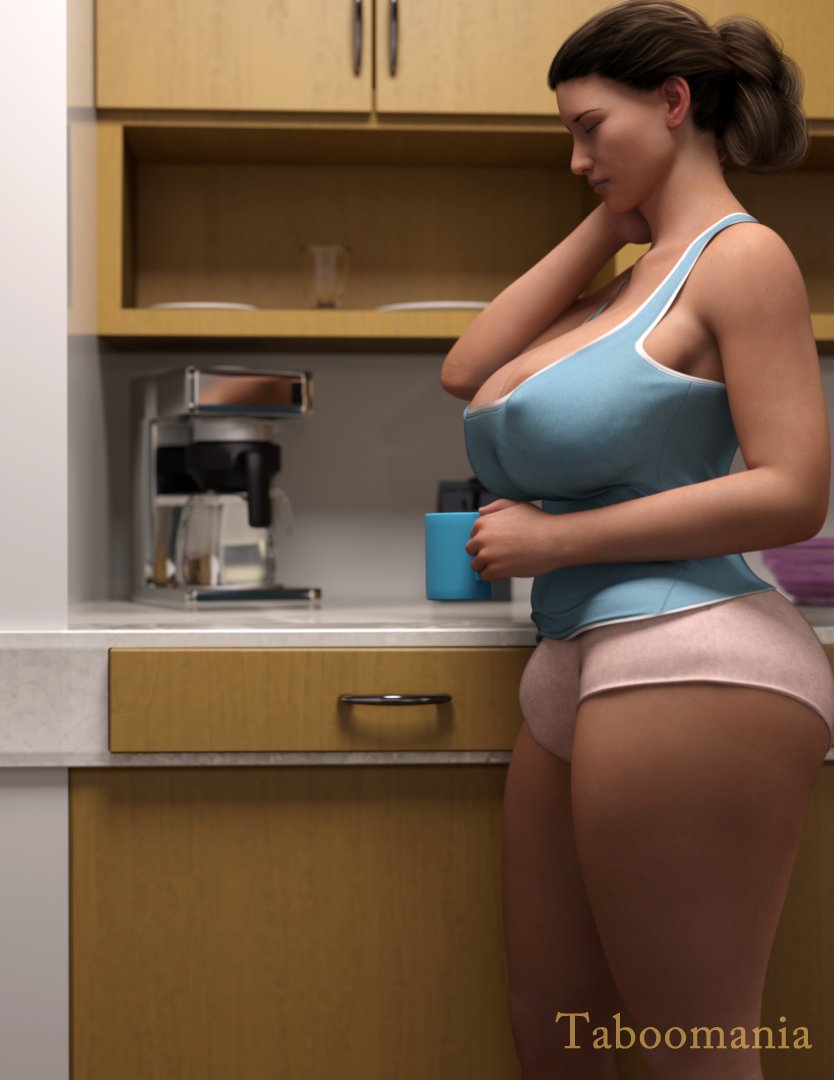
This is a tutorial from Taboomania, the original tutorial was posted by Taboomania on Twitter a while ago and we thought it would be nice to turn it into a blog-post to share with all DAZ Studio 3D artists.
Who doesn’t like a good bulge 😉 Try it out for yourself and maybe you can share the results with us on Twitter
This Tutorial assumes that you are familiar with Daz Studio’s Smoothing Modifier and D-former tools.
Step 1

The Smoothing Modifier and D-former are usually my go-to tools when creating bulges for my charactes. Combined, these tools provide a subtle yet accurate hint of what’s hidden under a character’s garment.
I find that the D-former can act a little weird when applying it to a character that’s already been posed and moved around, so I suggest you start with a character in zero pose for the easiest workflow.
Put your favourite clothing item on her and get ready. I also like to shape and pose the genitalia in a way that makes it look a little more ‘packed up’ than usual.
Step 2

Red covering the far bottom of the crotch
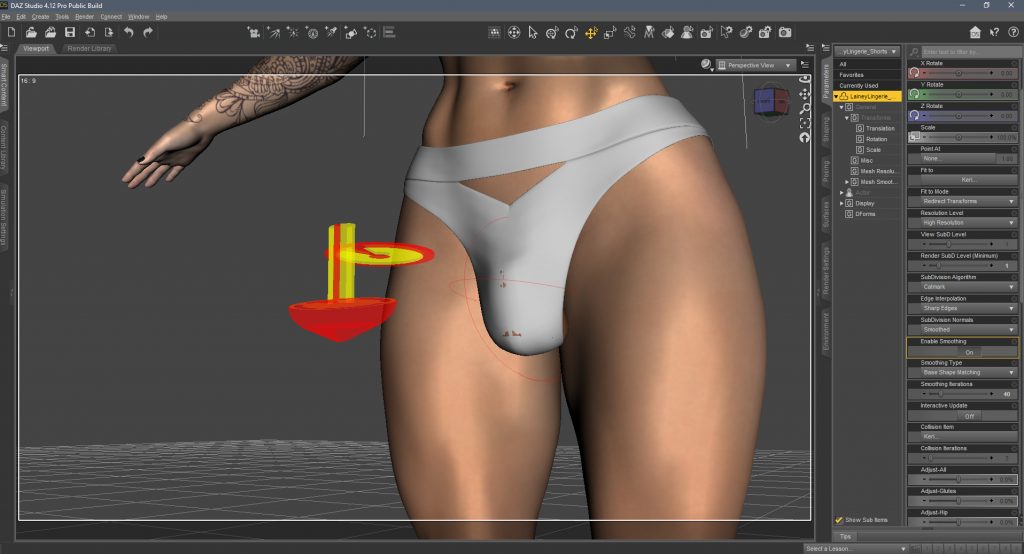
First, apply a D-Former to the clothing item of your choosing. This will be used to make the basic shape of the bulge.
Place the D-Former field so that you can cover mostly the lower part of the crotch. I usually end up with the field having an oval shape. Make sure to scale up the Z axis of the field, as it will give you a smoother shape below and towards the rear.
As you start shaping the basic bulge with the D-Former Controller, avoid covering the entire genitalia. Make sure you have some parts poking through at this stage, as it will give your bulge some nice details in the end. Scaling the X-axis of the controller is great for giving women’s underwear more width at the bottom.
Step 3
With the basic bulge shaped, it’s time to apply the Smoothing Modifier. If your clothing item does not have the smoothing modifier in it’s parameters tab already, select it and go to the Top Menu > Edit > Object > Geometry > Add smoothing modifier.
Playing with the Smoothing iterations and Collision iterations sliders should yield some pretty neat results. The parts of the genitalia that weren’t covered with the base bulge will now create visible contours that clearly hint at what’s underneath.
There will often still be some poking through as seen here, but it can easily be fixed by either editing the D-Former, hiding the futalicious shell, photo editing after rendering, or any other trick you can think of.
Even more poking through can appear when rendering. This is often caused by vein bump maps on the futalicious shell. Try removing those or reducing the offset distance of the shell in the Parameters tab.


1 Comment